

Which welding tasks should you automate first-and what must be ready before you buy equipment?
For manufacturers facing inconsistent weld quality, production bottlenecks, or skilled labor shortages, welding automation can provide a practical path toward more predictable manufacturing.
However, successful automation involves much more than purchasing a welding robot. The right solution depends on your parts, production volume, welding process, available space, and quality requirements.
This beginner-friendly guide explains how automated welding works, which applications are suitable, how to compare equipment, and how to plan a successful implementation.
You'll also learn how to estimate costs, calculate payback, and avoid common mistakes before investing in a robotic welding system.

What Is Welding Automation?
Welding automation is the use of controlled equipment to perform welding operations with repeatable movement and process settings, reducing the need for continuous manual torch manipulation. Depending on the system, operators may still prepare, load, inspect, and unload workpieces.
Automation can range from a simple motorized welding fixture to a fully integrated industrial robot cell.
According to the American Welding Society's welding automation terminology, welding methods differ primarily in how equipment and operators control the welding operation.
|
Term |
Operator Involvement |
Example |
|
Manual welding |
Controls and moves the welding tool |
Hand-held stick welding |
|
Semiautomatic welding |
Moves the torch while equipment controls functions such as wire feeding |
Manual MIG welding |
|
Mechanized welding |
Oversees machine-driven movement and makes necessary adjustments |
Motorized seam-welding equipment |
|
Robotic welding |
Programs and supervises controlled robot movement |
Six-axis robotic MIG welding cell |
A typical robotic system combines a welding power source, robot arm, controller, torch, fixtures, sensors, and protective equipment.
Gas metal arc welding (GMAW), commonly called MIG/MAG welding, is one process used in automated applications. Other options include gas tungsten arc welding (GTAW/TIG) and resistance spot welding.
The welding process and the automation method are separate decisions. To understand their differences, compare common welding processes before selecting equipment.
Which Welding Jobs Should You Automate First?
The first challenge in welding automation for small manufacturers is identifying the right application.
Not every welding task benefits equally from automation. Jobs with repeatable weld locations, predictable part geometry, and consistent production requirements are often easier starting points.
Consider five factors before choosing your first project.
1. Part repeatability
Do workpieces arrive with consistent dimensions, joint gaps, and welding locations?
Robots follow programmed movements accurately, but inconsistent parts can create alignment problems.
2. Welding accessibility
Can the torch reach every joint without colliding with fixtures or surrounding equipment?
Complex geometries may require additional robot axes or workpiece positioners.
3. Production demand
How many parts are required per shift, and how frequently does the product design change?
Consistent demand can simplify programming and investment justification, although flexible systems may also accommodate smaller production batches.
4. Upstream preparation
Are cutting, forming, and assembly processes repeatable?
Consistent part preparation and fit-up are essential to reliable automated welding.
5. Available personnel
Who will operate, maintain, program, and inspect the system?
Automation changes workforce responsibilities rather than removing the need for technical expertise.
Welding Readiness Checklist
|
Welding Automation Readiness Check |
Evidence to Review |
Recommended Action |
|
Part repeatability |
Dimensional records and joint consistency |
Standardize upstream processes |
|
Weld accessibility |
Drawings, weld locations, and fixture layout |
Check robot reach and orientation |
|
Production demand |
Annual volume and product mix |
Identify suitable part families |
|
Loading consistency |
Loading time and clamping variation |
Develop repeatable fixtures |
|
Personnel readiness |
Operator and maintenance capabilities |
Plan technical training |
For example, a hypothetical manufacturer producing identical steel brackets every day may be a stronger automation candidate than a repair workshop handling different damaged components each shift.
However, no universal production-volume threshold guarantees a positive return.
Next step: Use this readiness checklist to evaluate your first part family, then request an RBTIC application review before selecting equipment.
Robotic Welding vs Manual Welding: Compare Your Options
Understanding robotic welding vs manual welding helps manufacturers decide whether automation is appropriate for their workload.
Manual welding provides flexibility when working with prototypes, repairs, and unpredictable joint conditions. Robotic welding offers programmable motion and repeatable weld paths, making it attractive for standardized production.
However, the best welding automation solutions depend on the entire manufacturing process rather than robot performance alone.
Comparison of Welding Methods
|
Welding Method |
Suitable Workload |
Main Limitation |
|
Manual welding |
Repairs, prototypes, customized fabrication |
Productivity and consistency depend on operator skill |
|
Mechanized or fixed automation |
Repetitive joints and stable product families |
Limited flexibility when geometry changes |
|
Collaborative robot welding |
Smaller batches and flexible applications |
May face speed, payload, and reach limitations |
|
Industrial robotic welding |
Repeated production with multiple weld positions |
Requires suitable fixtures, programming, and integration |
Two important system categories are fixed and flexible automation.
Fixed systems are commonly designed around a specific operation or family of similar components. Flexible robotic systems can switch between different programs and fixtures, although changeovers require planning.

How to Choose the Right Solution
Consider the following questions:
Are parts manufactured in consistent batches?
Does the robot need to approach welds from several directions?
How frequently will operators change products or fixtures?
Can loading and unloading keep pace with the welding cycle?
What safety measures are required for the complete application?
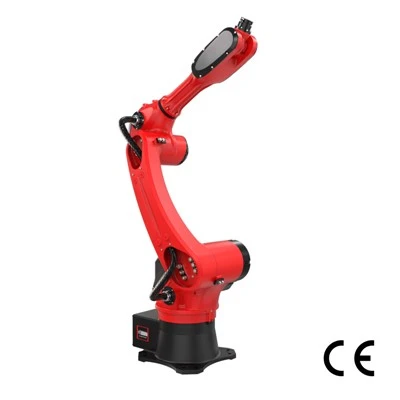
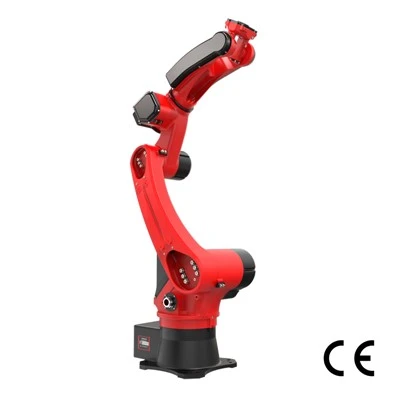
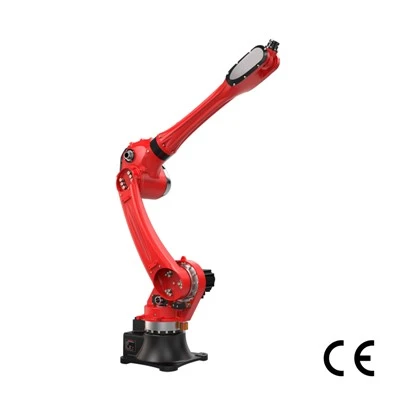
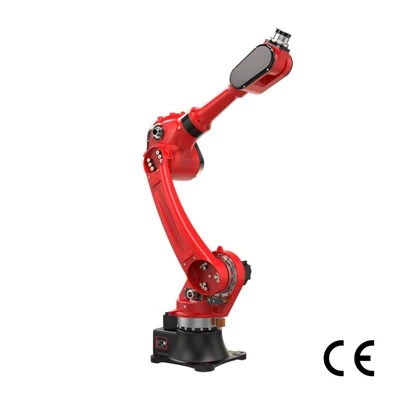
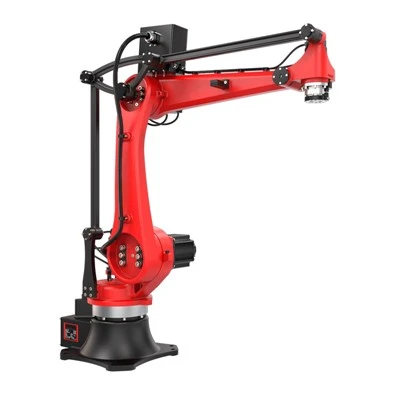
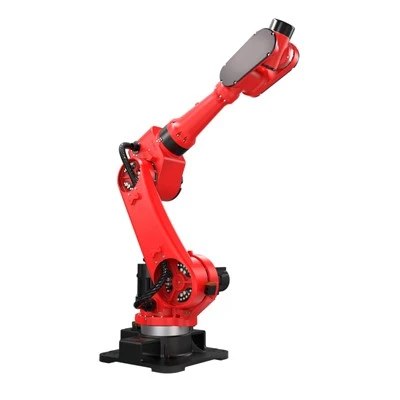
For manufacturers requiring flexible multi-angle welding, a six-axis industrial robot is worth evaluating.
RBTIC offers different robot configurations for welding applications, including models with varying reach and payload specifications.
You can explore our models of indutrial robots to compare available configurations.
How to Automate Welding in Five Steps
If you're learning how to automate welding, the most effective approach is to start with the manufacturing process rather than selecting a robot immediately.
The following five-step workflow helps beginners move from initial assessment to validated production.
Step 1: Define Your Welding Requirements
Start by documenting what your existing welding operation must accomplish.
Record essential information, including:
Base materials and thicknesses
joint geometry and weld locations
Required production volume
Current cycle time and rework rate
Applicable weld quality and inspection requirements
Measure the complete production cycle, not just arc-on time. Loading, positioning, cleaning, and inspection may account for a substantial share of total production time.
Establish a baseline so that automation performance can be evaluated against real operating data.
Key deliverable: A documented welding-process specification and production baseline.
Step 2: Prepare Parts and Design Fixtures
A robot can repeatedly follow a programmed path, but that does not guarantee a satisfactory weld when workpiece positioning changes.
Fixtures must locate and secure parts consistently while allowing access to the required joints.
Evaluate clamping, dimensional tolerances, joint gaps, distortion, and welding-torch clearance. Where necessary, improve upstream cutting or forming operations before continuing.
Sensors and seam-tracking systems may help manage certain variations, but they cannot compensate for every fit-up problem.
Key deliverable: A repeatable workpiece-loading and fixturing concept.
Step 3: Select and Integrate the Equipment
Once the application is defined, select a compatible robot and welding process.
A typical integrated cell may require:
Robot arm and controller
Compatible welding power source and torch
Wire feeder or other process equipment
Fixtures and workpiece positioners
PLC controls and application-specific sensors
Fume extraction and safeguarding
Robot reach, payload, tool orientation, and cable routing must be checked against the actual workpiece.
For example, the RBTIC BRTIRUS1510A six-axis welding robot is listed with a 10 kg payload, 1,587 mm reach, and ±0.05 mm repeatability.
These are manufacturer-specified robot characteristics-not guarantees of weld accuracy or final product quality.
Key deliverable: A complete cell specification covering equipment, tooling, controls, and integration.
Step 4: Program, Test, and Validate
Programming defines how the robotic system moves and coordinates with the welding equipment.
Qualified personnel must establish suitable welding parameters, verify tool positioning, and validate procedures against the applicable requirements.
Where required, the welding procedure specification (WPS) documents the essential parameters and conditions for producing acceptable welds.
Before production begins, the team should verify robot motion, safety functions, weld appearance, required inspection results, and repeatability.
Simulation and controlled testing can help identify potential issues, but they do not replace real-world commissioning and weld qualification.
Key deliverable: An approved welding procedure, verified system operation, and documented acceptance results.
Step 5: Run a Pilot Before Scaling
Begin with a limited production trial using representative parts.
Measure:
Accepted parts per operating hour
First-pass yield
Loading and changeover time
Rework and scrap
Downtime and maintenance
Cost per accepted part
You can monitor welding production and process data to identify missed welds, abnormal operating conditions, and potential inefficiencies.
However, process monitoring does not eliminate required product inspection.

An RBTIC application example
On its official website, RBTIC describes a dual-station MIG welding project in India involving four six-axis robots working with 3 mm carbon steel sheet-metal parts.
The company reports four short welds per part and an approximate 30-second part cycle. Each cell uses a dual-station positioner so loading and unloading can take place at the opposite station while welding is performed.
This supplier-reported application illustrates how fixtures, positioning, and operator workflow contribute to cell performance. Its cycle time should not be treated as a benchmark for unrelated parts.
For more information on selecting a suitable robot, review RBTIC's welding robot selection guide.
Welding Automation Cost and ROI: Build a Realistic Budget
Understanding welding automation cost is essential before committing to new equipment.
The purchase price of a robot is only one component of the total investment.
A complete project may also require fixtures, welding equipment, positioners, safety systems, electrical installation, programming, operator training, and commissioning.
Recurring expenses include consumables, maintenance, electricity, software, and technical support.
Build Your Cost Worksheet
|
Welding Automation Cost Item |
Budget Amount |
What to Include |
|
Robot and welding equipment |
Supplier quotation |
Robot, controller, torch, and power source |
|
Fixtures and peripherals |
Supplier quotation |
Clamps, positioners, and tooling |
|
Integration and commissioning |
Project estimate |
Programming, installation, and testing |
|
Facility modifications |
Site estimate |
Electrical supply, extraction, and safeguarding |
|
Operating expenses |
Annual estimate |
Maintenance, consumables, energy, and support |
All amounts should come from dated quotations or clearly identified assumptions.
How to Calculate Simple Payback
A practical starting point for welding automation ROI analysis is the simple payback period.
Simple Payback = Initial Installed Investment ÷ Annual Net Cash Benefit
These figures are illustrative assumptions, not RBTIC quotations or industry averages.
Annual net cash benefit should account for measurable savings and incremental contribution after additional operating costs.
For example, transferring employees to other tasks does not automatically create cash savings. Likewise, increased sales revenue should not be counted entirely as profit.
Simple payback also differs from full lifecycle ROI, which considers investment returns over a defined period.
Before purchasing, test different assumptions for production demand, uptime, rework, and operating costs.
Next step: Use this cost worksheet to organize your budget, then request an itemized welding-system quotation from RBTIC based on your actual production requirements.
Welding Automation Safety: What Must Be in Place?
Welding automation safety requires evaluating both robotic movement and the hazards created by the welding process.
Robots can reduce direct operator exposure during some welding operations, but automation does not eliminate hazards.
According to OSHA's welding hazards and controls guidance, welding can expose workers to metal fumes, ultraviolet radiation, electrical hazards, and burns.
Automated cells also introduce potential risks from moving machinery, fixtures, and equipment.
Essential Safety Requirements
|
Welding Automation Safety Hazard |
Control to Assess |
Verification |
|
Unexpected robot movement |
Guards, interlocks, and protective devices |
Functional safety tests |
|
Welding fumes |
Suitable local exhaust ventilation |
Exposure and ventilation assessment |
|
Arc radiation |
Appropriate welding screens and enclosures |
Shielding inspection |
|
Burns and fire |
Hot-material controls and fire precautions |
Workplace inspection |
|
Electrical and stored energy |
Isolation and lockout procedures |
Maintenance safety review |
Every robotic welding application requires a risk assessment appropriate to its hazards and operating environment.
OSHA's industrial robot safety guidance provides information about system-level safeguards and collaborative applications.
Importantly, a collaborative robot does not automatically make welding safe without protective measures. The complete system must be evaluated, including the torch, hot workpiece, fumes, and operator interaction.
Operators and maintenance personnel also need documented training and safe operating procedures.
OSHA guidance applies to the United States; manufacturers elsewhere must evaluate their applicable local requirements and standards.
For application-specific safety integration, contact RBTIC to discuss the proposed cell layout and operating conditions.
Frequently Asked Questions
Can a Small Manufacturer Start With One Part Family?
Yes. Welding automation for small manufacturers can begin with a single repeatable product family rather than an entire production line.
The decision should depend on joint consistency, production demand, changeover requirements, available space, and the expected financial return.
Starting with one well-defined application can also simplify training and system validation.
Will Automation Eliminate the Need for Skilled Welders?
Not necessarily.
Automated welding systems still require people to develop procedures, prepare workpieces, monitor performance, inspect welds, maintain equipment, and solve process problems.
Automation often changes how welding expertise is applied rather than eliminating the need for it.
What Information Should I Provide for a Welding Automation Feasibility Review?
Providing accurate application information helps suppliers evaluate suitable equipment and integration requirements.
Useful information includes product drawings, materials, thicknesses, weld locations, production volumes, existing cycle times, available floor space, and inspection requirements.
Only share drawings and technical information you are authorized to disclose.
Start Your Welding Automation Project With RBTIC
The most effective welding automation solutions begin with a clear understanding of your parts, production objectives, and operational constraints.

RBTIC provides industrial robots and integrated automation systems, including robotic welding configurations tailored to different manufacturing requirements.
From initial application assessment to robot selection, fixture design, programming, and commissioning, the goal is to develop a system suited to the actual production process.
Ready to explore your options?
Request a welding automation feasibility review from RBTIC.
Share your product details and manufacturing goals to begin discussing a suitable robotic welding solution and project quotation.